Archive | Wreaths RSS feed for this section

Cute as a Button

23 Feb

So many things to make with buttons…
Here’s a round-up of ideas!

Button Napkin Holder

buttoncardSimply glue buttons of choice to vintage cards. Choose 5 colors of silk ribbon; gather into a bunch, cut into 8″ pieces, and knot one end of each. Punch 2 holes in sides of vintage button cards. Pull unknotted ribbon ends up through each hole so knot catches under card. Tie loose ends under napkin.

Button Wreath

Button Wreath
Glue buttons of similar colors to wreath form and voila!

Button Monogram Wall Art

Button Monogram Wall Art
Print an enlarged letter in the font of your choice. Cut it out and keep the outline as a stencil. Glue different shapes and sizes of buttons inside the letter. Remove the stencil and hang.

Button Favor Boxes

Button Favor Boxes
Just a small piece of felt with a glued button and buttonhole decorates this round wooden box.

Button Packaging
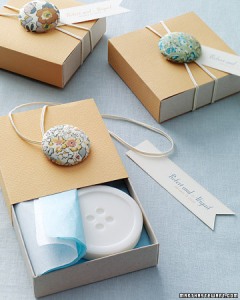
Button Packaging
Embellish a gift by using fabric-covered buttons attached to cords!
Cute and easy.

Button Rings

Button Rings
Tutorial HERE

Button Coasters
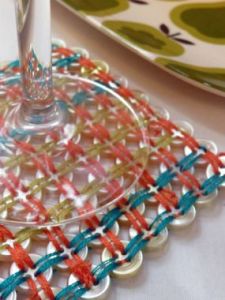
Button Coasters
Tutorial HERE

Button Art
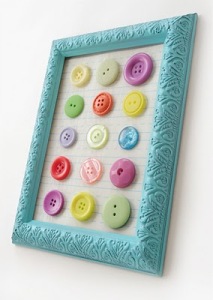
Button Art
Tutorial HERE

Button Hair Pins

Button Bobby Pins
Tutorial HERE

Button Lampshade

Button Lampshade
Tutorial HERE

Button Art
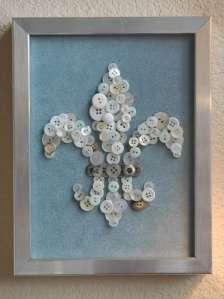
Button Art
Tutorial HERE

Button Wine Charms
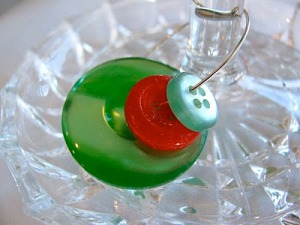
Button Wine Charms
Tutorial HERE

Enjoy!

Julie

Were You Featured? GRAB A BUTTON!

Blooming Yarn Wreath

10 Feb

A TEN51 TUTORIAL

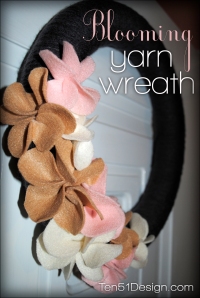
Bloomin Yarn Wreath

You’ll need a Hot Glue Gun, Scissors, Foam Wreath, Yarn and 3 Felt Sheets {colors of your choice}. I got all my materials at Michaels

First wrap one loop around your foam wreath and tie a tight knot to hold yarn in place. Then…. start wrapping! Do this until the entire ball of yarn is used. Be sure to knot the end to an adjacent piece of yarn when you finish. Next, cut circles out of your felt. You’ll need 6 circles to create each flower. I cut 2 in. circles for large flowers and 1 in. circles for smaller ones. {I made 9 flowers total: 1 large one and 2 smaller ones of each color… or 6 large circles and 12 smaller circles of each color} Once you have your circles cut, fold an edge of each circle and hot glue to itself to make a puckered petal. Once you have all 6 petals, it’s time to glue the folded parts together to create your flower. Angle them to create a nice bloomed flower. Next, layout the flowers on your yarn wreath until you like the arrangement. Hot glue to make it permanent and you’re done!

Bloomin Yarn Wreath Tutorial

My front door is white so I chose navy yarn with cream, tan and light pink flowers.
Enjoy!

Julie


JOIN THE PARTY!


Wreath Love

30 Jan
Wreaths, wreaths, and more wreaths! They’re all so pretty.
 {CYO} Create Your Own Winter and Valentine’s Wreaths

YARN WREATH TUTORIAL HERE

from Take to Heart


FELT ROSETTE WREATH TUTORIAL HERE

from Twin Dragonfly Designs

ACORN WREATH TUTORIAL HERE

from MADE

RUFFLE FELT WREATH TUTORIAL HERE
 
from Domestifluff


RUFFLE FABRIC WREATH TUTORIAL HERE

from Kelly Hicks Design

CORK WREATH TUTORIAL HERE
from LollyChops

ICE WREATH TUTORIAL HERE
from The Idea Room

VALENTINE HEART WREATH TUTORIAL HERE 
from The Idea Room
ARGYLE HEART WREATH TUTORIAL HERE 
from Mine for the Making

 BURLAP WREATH TUTORIAL HERE 
from Laugh, Love, and Craft

DOILY WREATH TUTORIAL HERE
from The Charity Wedding


CUPCAKE PAPER WREATH TUTORIAL HERE

from Tatertots and Jello


FABRIC WREATH TUTORIAL HERE

from the Patriotic Peacock

Enjoy!
Were you featured? GRAB A BUTTON